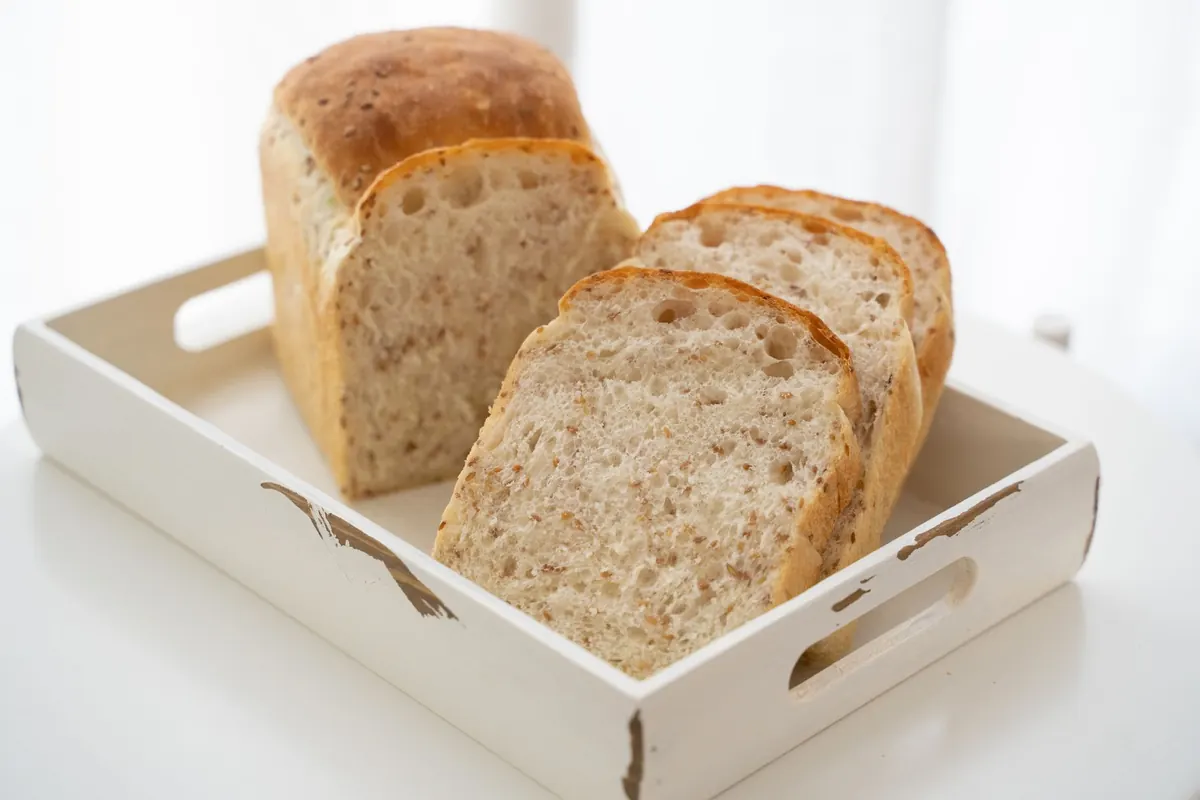
The knife goes through, the halves fall open, and there it is: the crumb. Some bakers glance at it and reach for the butter. Others stare at it the way you'd study a map. If you're in the second group, this is for you. A crumb isn't a grade — it's a record of everything that happened between mixing and the moment the loaf left the oven. How fast your starter worked. How you folded. How firmly you shaped. How hot the bake ran. Learning to read that record turns a vague sense that "something was off" into a specific change you can make on the next bake.
Cut Cool, Look Straight On
Before you read anything, give the loaf time. A sourdough needs at least four hours to cool, and overnight is better. Cut it warm and the starch hasn't finished setting; the crumb smears under the blade and looks gummy no matter how well you baked it. You'll blame your fermentation for something that was really just impatience.
Use a serrated knife and a smooth sawing motion, straight down through the middle. Then look at the cut face square on, not from an angle, because a tilted view flatters a loaf. Take a photo in daylight. The camera catches things your eye politely forgives.
Finally, touch it. Press a fingertip into the crumb and let go. It should spring back and feel moist without being wet. Smell it too: a clean lactic tang is welcome, but a raw, beery, almost yeasty smell often points to a fermentation that ran short or a bake that stopped early.
What a Good Crumb Actually Looks Like
There's no single ideal, and that's the first thing to get straight. A country hearth loaf and a pan-baked sandwich loaf are not supposed to look alike. But healthy crumb in any style shares a few markers: holes of more than one size, walls thin enough to look translucent when you hold a slice to the window, no heavy band running through the loaf, and a surface that's glossy rather than dull and dry.
An open crumb comes from three things working together: enough water, gluten strong enough to hold it, and gas produced at a steady pace while the dough still has structure to contain it. Take away any one of those and you get something else entirely — a tight crumb, a collapsed crumb, or a crumb with a few showy holes surrounded by dense dough.
Open Crumb: Strength or Chaos?
Big holes photograph beautifully and sell books, but they aren't automatically a sign of good bread. The useful question is where the openness sits. When medium and large holes are spread through the loaf, with thin glossy walls between them, you're looking at a well-developed dough that fermented properly. Keep doing what you did.
When the big holes cluster under the top crust and the bottom third of the loaf is tight and slightly damp, that's not openness. That's under-fermentation wearing a costume. The dough went into the oven before the center had caught up, so the gases that formed near the hot crust blew out fast while the cooler core stayed compressed. Bakers sometimes call it a fool's crumb, and the name is fair.
Over-fermented dough produces a third pattern: a pale, flat loaf with a crumb that feels cottony and damp, holes stretched into long horizontal shapes, and a structure that sags rather than opens. The gas was there. The framework to hold it had already weakened.
Dense Spots and What They're Telling You
A tight, gummy core
The center of the slice looks closed and slightly wet while the outer crumb is fine. Usually the bulk fermentation was too short, or the dough was too cold and the middle lagged behind the edges. Extend the bulk by thirty minutes, move the bowl somewhere warmer, or check your starter's activity before you mix.
Tunnels right under the crust
Classic under-proof. The final proof needed longer, or the dough needed a warmer spot, or your inoculation was too high for the temperature of your kitchen. Try a slightly longer final proof and watch for the dough to feel softer and more pillowy before it goes in.
A dense, pale band along the bottom
Often a shaping issue. If you press the seam too firmly or squash the dough onto the bench, you compress the crumb at the base. It can also mean an underbaked bottom, so check that the base sounds hollow and isn't pale and soft.
A small, even, tight crumb throughout
Plenty of degassing, firm shaping, lower hydration or a weaker flour will all do this. In a sandwich loaf it's exactly what you want. In a country loaf it usually means you were too heavy-handed at the final shape.
Crumb that tears in long streaks
Usually cosmetic. High tension at shaping plus a strong flour can make the crumb split along the tension lines as it expands. The bread eats fine. Loosen your shaping slightly if the look bothers you.
One more thing worth saying: whole grain and rye flours produce denser crumb by nature. Chasing a wide-open crumb in a 100% rye is a losing game, not a technique problem.
A Symptom-to-Cause Field Guide
- Large holes at the top, dense gummy base: under-fermented. Lengthen the bulk or final proof, warm the dough a little, or build a more active starter.
- Flat loaf, pale crust, damp cottony crumb: over-fermented. Shorten the bulk, cool the dough, or reduce the starter percentage.
- Even small holes with a good rise: heavy degassing or tight shaping. Handle the dough gently at the final shape and skip the last fold.
- Irregular holes throughout, thin glossy walls: a well-developed dough at higher hydration. Repeat it.
- Dense band at the bottom: compressed seam or bench pressure, or an underbaked base.
- Crumb sticking to the knife: underbaked, or cut too warm. Bake a few minutes longer and wait before slicing.
Change One Thing Per Bake
Reading crumb only pays off if it changes what you do next, and the fastest way to confuse yourself is to change three variables at once. Pick the single most obvious symptom in the loaf in front of you. Match it to one adjustment from the list above. Then bake the same recipe again with only that change, and compare the photos side by side.
Small moves are usually enough. Fifteen to thirty minutes extra bulk. Two or three degrees warmer. A gentler final shape. An extra five minutes in the oven with the lid off. If you make a large correction and the bread improves, you won't know which part helped, and you'll struggle to repeat it.
Keep a Crumb Log
A notebook or a folder of photos on your phone is enough. Note the flour, hydration, starter percentage, room temperature, bulk time and bake time, then stick a picture of the cut loaf next to it. After six or seven bakes you'll have something better than any general rule: a record of how your starter, your flour and your kitchen behave together. That's the real skill. The crumb is just the page it's written on — so cut the next loaf, look closely, and let it tell you what to do differently.
Photo: Cats Coming / Pexels